When it comes to identifying and repairing a leaking wall from rainwater, it is crucial to approach the task with a professional mindset and seek the expertise of qualified contractors or waterproofing specialists.
Indications of wall leakage may encompass damp patches, flaking paint, or a musty smell. Detecting water in your walls can be a demanding task, necessitating meticulous inspection and potentially even the employment of specialised equipment.
Safety considerations should also be prioritised, ensuring that you take necessary precautions to evade any possible hazards.
In this discussion, we will delve into the potential sources of wall leaks, provide instructions for repairing them, and discuss the importance of discarding damaged materials and remediating mould.
So, let’s embark on this journey together to discover effective solutions for addressing and preventing water leaks, ultimately safeguarding the integrity of your walls.
Key Takeaways
Identifying and repairing a leaking wall from rain water requires the skills and apparatus of specialist contractors or damp-proofing experts. It is vital to swiftly address wall leaks to avert further damage and potential mould growth.
By sticking to safety measures and thoroughly cleaning and dealing with affected areas, you can effectively handle wall leaks and protect your walls from future water damage.
Signs of Wall Leakage
Wall leakage can be identified through various signs, such as musty smells, peeling paint or wallpaper, bubbles, sagging walls or ceilings, and water stains. These signs are indicators of water damage and should not be overlooked, as they can lead to further issues if not addressed promptly.
Musty smells are often the first sign of wall leakage caused by rainwater. The moisture seeping through the walls creates a damp environment, resulting in a musty odour.
Peeling paint or wallpaper is another common sign of water seepage. As water infiltrates the wall, it causes the paint or wallpaper to lose adhesion and peel away.
Bubbles on walls or ceilings should also raise concerns. These bubbles are formed when water becomes trapped underneath the surface, creating a bulging effect.
Sagging walls or ceilings are a more severe indication of water damage. The weight of the water causes the affected area to sag or droop, necessitating immediate attention.
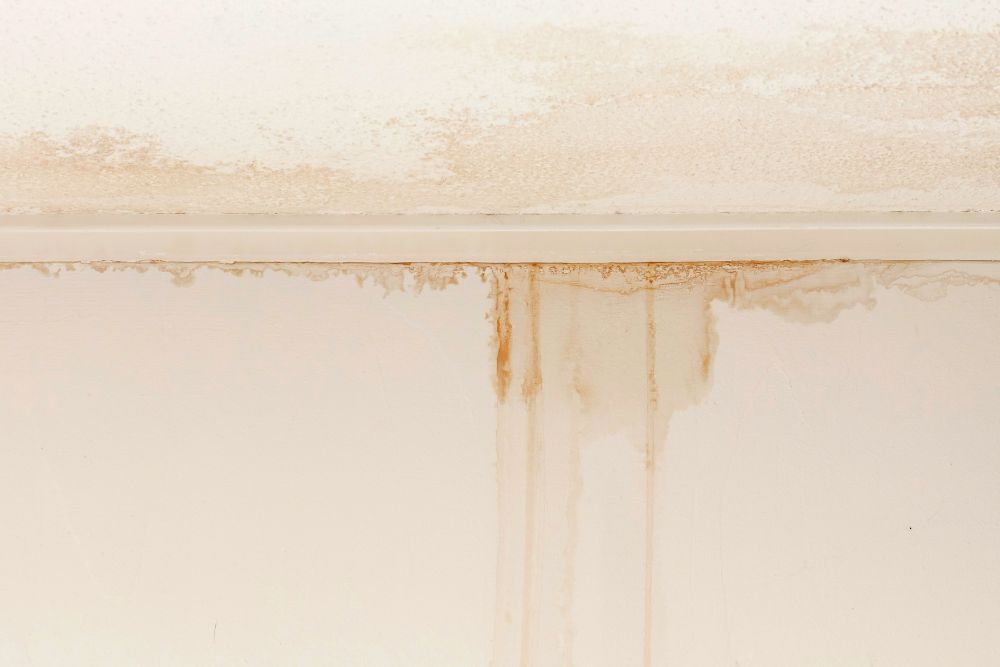
Water stains on walls or ceilings are a clear sign of wall leakage. These stains can vary in size and colour, depending on the severity and source of the leak.
It is important to identify the source of the leak, as it could be coming from the exterior of the building, such as a cracked foundation or damaged roof.
Identifying Water in Your Walls
In the process of identifying water within your walls, there are numerous crucial indications of water damage that you need to be vigilant about.
Musty odours, mould and mildew, peeling paint or wallpaper, sagging walls or ceilings, and bubbles on walls or ceilings all serve as markers of water infiltration.
Signs of Water Damage
One of the key indicators of water damage within the walls of a building is the presence of a musty odour. This distinct smell is often caused by mould and mildew growth, which thrive in damp environments.
In addition to the musty odour, there are several other visible signs that can help identify water damage in walls. These include peeling paint or wallpaper, sagging walls or ceilings, and bubbles on the surface. These signs indicate water infiltration and could be a result of plumbing issues or water leakage from the outside.
It is crucial to address these issues promptly to prevent further damage, as prolonged exposure to water can lead to structural damage and affect the overall integrity of the home.
Locating the Source
To accurately identify the source of water in the walls, it is vital to utilise various techniques and tools to locate the precise point of leakage.
One method is to listen for leaks by switching off all appliances and plumbing fixtures and attentively listening for the sound of water flowing or dripping.
Another approach is to visually inspect the walls for water stains or signs of dampness, especially after heavy rainfall.
In addition, using a moisture meter can aid in detecting the presence of water behind walls.
It is also crucial to check the floor near the walls for any signs of water leaks, as this can indicate a problem with the plumbing system.
Lastly, assessing the exterior of the building, such as the French drains or grading, can offer insights on how to prevent water from penetrating the walls in the first place.
Potential Sources of Wall Leaks
Water infiltration into walls can be caused by a variety of factors, including damaged or deteriorated exterior finishes, faulty flashing, and compromised sealants. Identifying the potential sources of wall leaks is crucial in order to effectively locate and repair the issue.
Here are some common culprits:
- Damaged or deteriorated exterior finishes: Cracks or holes in the exterior walls can allow rainwater to seep through, leading to water infiltration and potential leaks.
- Faulty flashing: Flashing is designed to provide a watertight seal around windows, doors, and other openings in the exterior walls. When the flashing is damaged or improperly installed, it can allow rainwater to penetrate the walls.
- Compromised sealants: Sealants play a vital role in preventing water from seeping into the walls. Over time, sealants can deteriorate or become damaged, allowing water to find its way in.
It is important to regularly inspect the exterior walls for any signs of water intrusion, such as wet spots, peeling paint, or water stains. Additionally, monitoring the moisture content of the walls can help identify potential leaks. Once the source of the leak is identified, appropriate measures can be taken to repair the issue and prevent further water infiltration.
Safety Considerations
Safety considerations must be taken into account when addressing wall leaks and repairing water infiltration issues. When dealing with a leaking wall from rainwater, it is important to prioritise safety to prevent any potential hazards and ensure a successful repair process.
First and foremost, it is crucial to wear waterproof gloves and a dust mask when cleaning mould that may have developed due to the water infiltration. This protective gear will help to prevent exposure to mould spores, which can cause health problems when inhaled.
Additionally, caution should be exercised when using ladders or working at heights to avoid falls and injuries. It is advisable to have a spotter or use safety harnesses when working on elevated surfaces.
Moreover, it is essential to turn off electricity to the affected areas before addressing the water leaks in walls to avoid the risk of electrical shock.
Structural integrity must also be considered. If there are concerns about the stability of the wall or ceiling, it is recommended to seek professional advice. They will be able to assess the situation and provide guidance on the necessary repairs.
Lastly, it is crucial to follow safety guidelines and manufacturer instructions when using tools and equipment such as moisture meters and infrared cameras. This will help ensure accurate readings and prevent any accidents or damage.
Instructions for Fixing a Wall Leak
When addressing a wall leak, it is significant to accurately identify the source of the water infiltration to determine the appropriate repair method. Here are some guidelines to assist you in rectifying a wall leak:
- Examine the grading around your home: Confirm that the grading slopes away from your walls. If the ground slopes towards your walls, it can cause water to accumulate and seep into the walls.
- Inspect gutters and downspouts: Make sure that your gutters and downspouts are clear of any debris that may obstruct the flow of water. Blocked gutters can lead to improper drainage, causing water to overflow and leak into the walls.
- Look for leaks behind appliances: Check for any leaks behind appliances that use water, such as washing machines or fridges. A small leak can gradually seep into the walls and cause damage over time.
Accurately identifying the source of the leak is crucial in order to rectify it effectively. It is also important to consider the potential impact on your water bill or water meter reading, as a hidden leak can result in increased water usage and costs.
Discarding Damaged Materials
To appropriately manage a wall leak and avert further harm, it’s key to throw away any water-damaged materials, such as plasterboard, insulation, or timber, while adhering to local waste management regulations. When dealing with a leaking wall, it’s crucial to remove and dispose of any materials that have been affected by water. This includes checking the plasterboard, insulation, and timber near walls or drips for signs of damage. A paint meter or an infrared camera can be used to spot hidden dampness in the wall.
Materials damaged by water should be discarded without delay to prevent mould growth and structural problems. Mould can flourish in damp environments, and leaving water-damaged materials in place can lead to more damage and potential health risks. It is vital to replace damaged materials with new, undamaged ones to reinstate the structural integrity and safety of the wall.
When handling and disposing of damaged materials, it’s essential to use protective gear, such as gloves and a dust mask, to minimise health risks. Additionally, it’s key to follow local waste management regulations to ensure proper disposal and prevent environmental contamination.
Proper storage and transport of the discarded materials is also important to prevent the spread of mould or contaminants to other areas of the home. By taking these steps to throw away damaged materials, you can effectively manage the wall leak and prevent future issues related to water in your home.
Cleaning All Surfaces
In order to effectively manage a wall leak and prevent additional damage, the following steps should be taken:
- Thoroughly clean all surfaces impacted by the leak. Cleaning all surfaces is vital to ensure that the source of the leak is properly addressed and that the area is prepared for repair. Here are some crucial steps to follow:
- Clean all surfaces with a mixture of water and mild washing-up liquid to remove dirt and grime. Use a scrubbing brush or sponge to gently scrub the surfaces, paying close attention to areas near the source of the leak.
- Rinse with clean water and dry thoroughly.
- Address areas affected by mould and mildew. For areas affected by mould and mildew, it is necessary to use a solution of one part bleach to three parts water. Apply the solution and scrub the affected areas, then rinse and dry. This will help eliminate any potential health hazards and prevent the spread of mould spores.
- Inspect and clean any surfaces that have been affected by the leak. This includes walls, ceilings, and floors. Ensure to check for any signs of water near electrical outlets or switches, as this could pose a safety hazard.
Remediation of Mould
The remediation of mould involves identifying and addressing musty smells, mould, mildew, and water stains in order to effectively eliminate and prevent further mould growth. To successfully remediate mould, it is important to first identify the source of the water intrusion. This can be done by conducting a thorough inspection of the affected area, looking for signs of leaks or water damage. Using a moisture metre can also help in assessing the extent of mould growth and identifying areas of high moisture.
Once the source of the water intrusion has been identified, it is crucial to fix the underlying issue to prevent future mould growth. This may involve repairing a leaking pipe, unblocking gutters, or installing a sump pump to prevent water from accumulating. It is important to turn off all taps and ensure that the exact location of the leak is repaired.
After addressing the source of the water intrusion, the next step in mould remediation is to remove and clean the affected surfaces. This may involve discarding damaged materials, such as mouldy plasterboard or carpet, and thoroughly cleaning all surfaces with a mould-killing solution. It is important to wear waterproof gloves and a dust mask while cleaning mould to prevent health issues.
Finally, repainting the wall with mould-resistant paint or applying mould-resistant wallpaper can help to prevent future mould growth. Regular maintenance and monitoring of the area can also help in early detection of any new mould growth.
To summarise, effective mould remediation involves identifying and addressing the source of water intrusion, removing and cleaning mould-infested materials, and taking preventative measures to prevent future mould growth.
| Step | Actions |
|---|---|
| 1 | Identify and address the source of water intrusion |
| 2 | Fix the underlying issue, such as repairing leaks or unblocking gutters |
| 3 | Remove and discard damaged materials |
| 4 | Thoroughly clean all surfaces with a mould-killing solution |
| 5 | Apply mould-resistant paint or wallpaper |
| 6 | Regular maintenance and monitoring for early detection of mould growth |
Frequently Asked Questions
How Do You Pinpoint a Water Leak in the Wall?
To pinpoint a water leak in a wall, common signs include water stains, mould growth, and musty odours. DIY methods include using a moisture meter or infrared camera. Professional techniques involve cutting into plasterboard or consulting a professional for effective repair. Prompt action is vital to prevent further damage.
How Do You Find the Source of a Leak in the Wall?
Identifying water damage and pinpointing the source of a wall leak is crucial for a swift resolution. Usual signs encompass damp spots, flaking paint, and mould growth. DIY methods such as assessing gutters and downpipes may be of assistance, but employing a professional for leak detection might be necessary. Once a wall leak is discovered, it’s vital to address it promptly by mending the damaged area and implementing preventative measures to avert future leaks. Comprehending the causes of wall leaks, such as inadequate drainage or fissures, can guide repair options, including sealing and damp-proofing. Regular maintenance, such as inspecting for and addressing any signs of water damage, can assist in maintaining a leak-free wall.
How Do I Stop Rain Water Leaking From the Wall?
To effectively stop rainwater from leaking through walls, it is crucial to recognise the signs of water damage, comprehend common causes, and implement preventative measures such as regular inspections, gutter maintenance, and using sealants. DIY techniques or professional assistance may be required for fixing wall leaks, considering the impact they can have on the home’s structure and occupants’ health.
What Tool Is Used to Find a Water Leak Behind a Wall?
To find a water leak behind a wall, various techniques and tools can be utilised, including moisture metres, infrared imaging, acoustic technology, pressure testing, and moisture mapping. Identifying the source of the leak is crucial in order to effectively repair wall leaks caused by rainwater.
Conclusion
In conclusion, identifying and repairing a leaking wall from rain water necessitates the expertise and equipment of specialist contractors or damp-proofing experts. It is crucial to promptly tackle wall leaks to prevent additional damage and potential mould growth.
By adhering to safety measures and meticulously cleaning and dealing with affected areas, you can effectively manage wall leaks and safeguard your walls from future water damage.
If you are having an issue of wet walls, speak to us today by calling 0432 899 026 or email info@smrbuilders.com.au.